Let's see your finished DIY projects!
Moderator: Ghost Hip
Forum rules
The DIY forum is for personal projects (things that are not for sale, not in production), info sharing, peer to peer assistance. No backdoor spamming (DIY posts that are actually advertisements for your business). No clones of in-production pedals. If you have concerns or questions, feel free to PM admin. Thanks so much!
The DIY forum is for personal projects (things that are not for sale, not in production), info sharing, peer to peer assistance. No backdoor spamming (DIY posts that are actually advertisements for your business). No clones of in-production pedals. If you have concerns or questions, feel free to PM admin. Thanks so much!
-
bodyisajerk
- involved

- Posts: 93
- Joined: Tue Dec 15, 2009 5:35 pm
- Location: seattle, wa
Re: Let's see your finished DIY projects!
man that demo comes out swinging, killer stuff!
-
intothegroove
- FAMOUS

- Posts: 1670
- Joined: Thu Jul 08, 2010 6:05 pm
- Location: The Junction
- Contact:
Re: Let's see your finished DIY projects!
Thanks so much man  really cool fuzzface build you did, love the funky knobs
-
mysteriousj
- committed

- Posts: 455
- Joined: Sun Mar 06, 2011 9:44 pm
- Location: NZ
Re: Let's see your finished DIY projects!
YESSSSSSSSSSSSSSSSSSS. Feeling like this!
[youtube]http://www.youtube.com/watch?v=AXwGVXD7qEQ[/youtube]
Approaching 9 months to get this delay finally going properly! NE570 I hate you Now I have the problem that it's 1mm too big for it's case
  .
.

[youtube]http://www.youtube.com/watch?v=AXwGVXD7qEQ[/youtube]
Approaching 9 months to get this delay finally going properly! NE570 I hate you
-
ThePastRecedes

- committed

- Posts: 170
- Joined: Tue Jun 26, 2012 11:03 pm
Re: Let's see your finished DIY projects!
Can we still call that diy ") That looks amazing!! anymore info on it?
That looks amazing!! anymore info on it?
-
culturejam

- Supporter

- Posts: 2381
- Joined: Sun Jun 28, 2009 5:25 pm
- Location: Nueva Yersey
Re: Let's see your finished DIY projects!
Couple recent builds of mine. Been on an alcohol inks finish craze lately. It's pretty and oh so easy.
First up is a vibe that I cooked up from a few basic existing building blocks (or circuit snippets, if you prefer). Not ready to release a schematic yet, but it will be forthcoming. Started working on the design back in February but just now got around to testing the proto boards. Everything works as is and it is dead quiet (no ticking whatsoever). The downside is that the physical layout of the hardware was pretty bad on my part. So I had to manually wire some stuff that should have been board mounted. And of course, one of the pots was wired backward. I do that every damn time.
Okay, so it's a two-stage vibe-phaser thing using LDRs as the variable resistance element. You may recall that I've played around with this general concept quite a bit. So far, this one is my favorite, as it hits the perfect mix between complexity and functionality.There is a phase mode and a vibe mode. The phase mode sound like the vibe mode with with no pitch shift at all (just filter-like oscillations) and a bit sharper vowel sound. It actually sounds good both slow and fast. Backing off the depth a bit smooths out the triangle LFO into more like a sine wave, which helps on slow speeds. It doesn't do sea-sick pitch bends, but you can definitely hear it in the vibe mode.
Finish is alcohol inks sealed up with Mod Podge, which also adds a nice texture.
DEMO:
It's a little quiet, so you may want to turn up your speakers a bit. Goofed up on the recording level setting.

===================
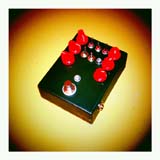
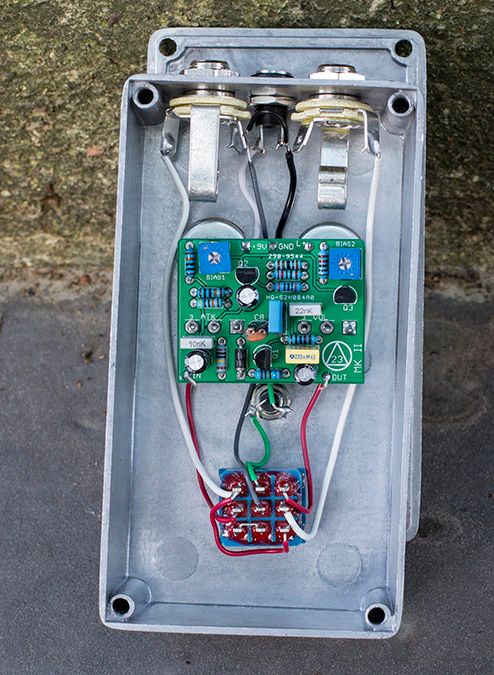
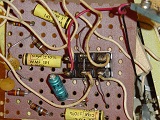
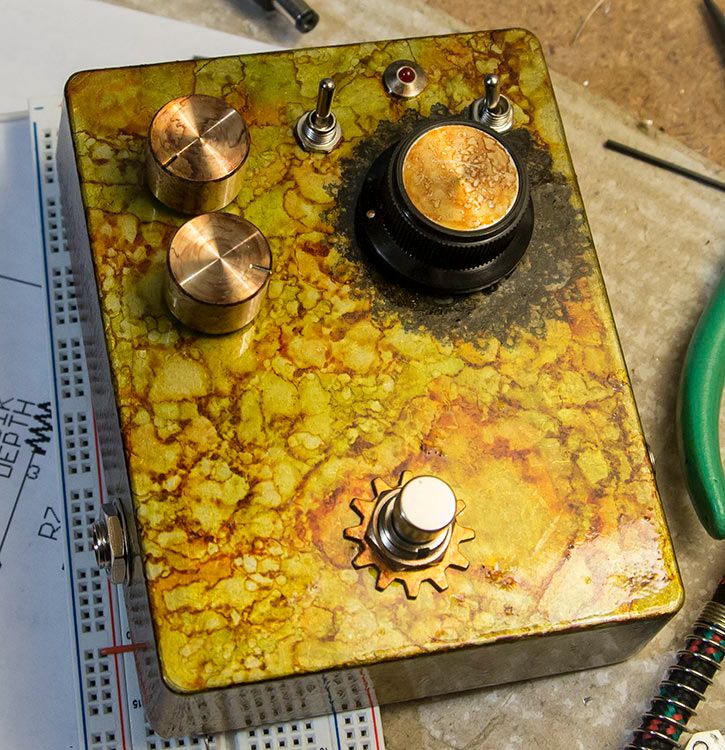
Next is my slight tweak on the classic Tonebender MKII. I switched to NPN silicon trannies (with smoothing caps to make it softer like germanium) for negative ground operation, and I added two trimmers (Q2 and Q3) to really get a hold of the bias. This might just be my favorite fuzz/distortion build ever. And that's a bold statement coming from me. This thing absolutely RIPS wide open, yet retains a ton of note clarity even with full chords.
Finish is my third try at alcohol inks + Mod Podge. I tried some new stuff this time around. Came out pretty neat. I didn't even bother finishing the sides or the back, because let's face it: nobody gives a shit about the sides.
The drilling is quite atrocious. I used one larger knob to offset to visual appearance of the pot shafts not be properly centered. But not even the fun finish takes your eye away from how far off the LED/bezel hole is.
I don't normally do the jacks on top, but I figured what the hell.

First up is a vibe that I cooked up from a few basic existing building blocks (or circuit snippets, if you prefer). Not ready to release a schematic yet, but it will be forthcoming. Started working on the design back in February but just now got around to testing the proto boards. Everything works as is and it is dead quiet (no ticking whatsoever). The downside is that the physical layout of the hardware was pretty bad on my part. So I had to manually wire some stuff that should have been board mounted. And of course, one of the pots was wired backward.
Okay, so it's a two-stage vibe-phaser thing using LDRs as the variable resistance element. You may recall that I've played around with this general concept quite a bit. So far, this one is my favorite, as it hits the perfect mix between complexity and functionality.There is a phase mode and a vibe mode. The phase mode sound like the vibe mode with with no pitch shift at all (just filter-like oscillations) and a bit sharper vowel sound. It actually sounds good both slow and fast. Backing off the depth a bit smooths out the triangle LFO into more like a sine wave, which helps on slow speeds. It doesn't do sea-sick pitch bends, but you can definitely hear it in the vibe mode.
Finish is alcohol inks sealed up with Mod Podge, which also adds a nice texture.
DEMO:
It's a little quiet, so you may want to turn up your speakers a bit. Goofed up on the recording level setting.
===================
Next is my slight tweak on the classic Tonebender MKII. I switched to NPN silicon trannies (with smoothing caps to make it softer like germanium) for negative ground operation, and I added two trimmers (Q2 and Q3) to really get a hold of the bias. This might just be my favorite fuzz/distortion build ever. And that's a bold statement coming from me. This thing absolutely RIPS wide open, yet retains a ton of note clarity even with full chords.
Finish is my third try at alcohol inks + Mod Podge. I tried some new stuff this time around. Came out pretty neat. I didn't even bother finishing the sides or the back, because let's face it: nobody gives a shit about the sides.
The drilling is quite atrocious. I used one larger knob to offset to visual appearance of the pot shafts not be properly centered. But not even the fun finish takes your eye away from how far off the LED/bezel hole is.
I don't normally do the jacks on top, but I figured what the hell.
Disclaimer #1: Co-Founder, Product Developer at Function f(x).
-
amnesiac305
- experienced

- Posts: 502
- Joined: Tue Nov 09, 2010 8:19 pm
Re: Let's see your finished DIY projects!
Wow those finishes look fantastic/unique. I need to learn more about this alcohol ink you speak of. Never heard of it before.
Excellent Transactions: monkeydancer, dorfmeister, Rygot, bronzetalon, PumpkinPieces, Wes Mantooth, Deltaphoenix, Blooghost, Fuzz_Pi, Neanderthal Head, lordgalvar
-
smallsnd/bigsnd

- IAMILFFAMOUS

- Posts: 3981
- Joined: Sat Nov 29, 2008 12:57 pm
Re: Let's see your finished DIY projects!
CJ those finishes are 
-
culturejam
- Supporter
- Posts: 2381
- Joined: Sun Jun 28, 2009 5:25 pm
- Location: Nueva Yersey
Re: Let's see your finished DIY projects!
Thanks, bro. Means a lot coming from you.smallsnd/bigsnd wrote:CJ those finishes are
The technique is really not hard at all. There are some good youtube tutorials on getting started with alcohol inks. You can get the inks and related sundries at most craft stores or you can save a few bucks and order online (or ebay).
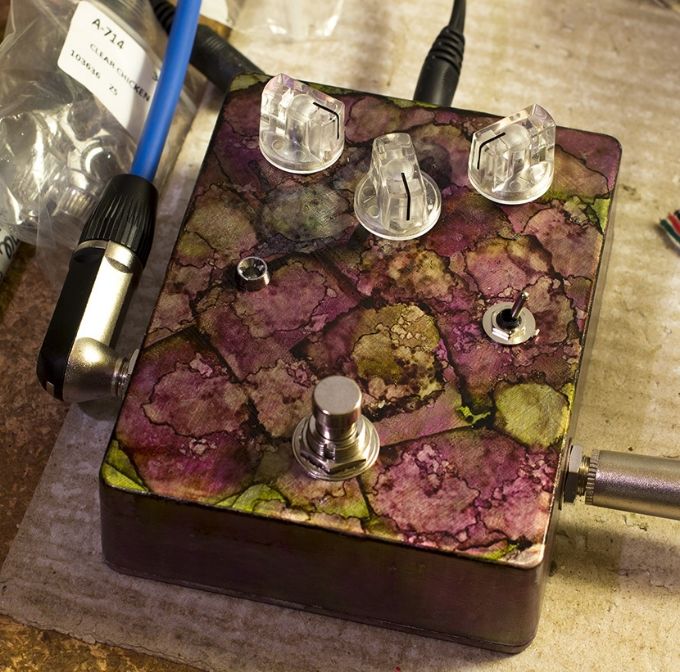
Three or four coats of Mod Podge is a very good seal for the inks (they will scratch off easily if not protected), but I recommend at least a light coat of clear acrylyic over top for max logevity. Here's another one I did with the same basic technique and two pretty thick clear coats over the inks and Mod Podge:
Disclaimer #1: Co-Founder, Product Developer at Function f(x).
-
kosta

- Supporter
- Posts: 5561
- Joined: Tue Mar 31, 2009 11:00 am
- Location: New York, NY
Re: Let's see your finished DIY projects!
Those look killer, CJ!
-
intothegroove
- FAMOUS
- Posts: 1670
- Joined: Thu Jul 08, 2010 6:05 pm
- Location: The Junction
- Contact:
Re: Let's see your finished DIY projects!
[/quote]Love the gear washer around the footswitch
-
LaoWiz

- Supporter
- Posts: 2035
- Joined: Wed Apr 14, 2010 4:03 pm
Re: Let's see your finished DIY projects!
Fucking excellent! Like being on acid lookin at hammerite. Amazing colors...culturejam wrote:Thanks, bro. Means a lot coming from you.smallsnd/bigsnd wrote:CJ those finishes are
The technique is really not hard at all. There are some good youtube tutorials on getting started with alcohol inks. You can get the inks and related sundries at most craft stores or you can save a few bucks and order online (or ebay).
Three or four coats of Mod Podge is a very good seal for the inks (they will scratch off easily if not protected), but I recommend at least a light coat of clear acrylyic over top for max logevity. Here's another one I did with the same basic technique and two pretty thick clear coats over the inks and Mod Podge:
Most active on Instagram
Mo Destinations:
Laowiz Big Cartel
Reverb Shop
Ebay Shop for Vintage Parts, Test Equipment, vintage radios
Shark Tank
Build Archive
Mo Destinations:
Laowiz Big Cartel
Reverb Shop
Ebay Shop for Vintage Parts, Test Equipment, vintage radios
Shark Tank
Build Archive
-
skullservant

- IAMILFFAMOUS
- Posts: 16575
- Joined: Wed Dec 28, 2011 12:55 am
Re: Let's see your finished DIY projects!
Finished up some random builds the past few weeks, mostly out of spare parts.
This is a Devi Aenima that I put together out of parts laying around. Has two oscillation switches, power starve, and a feedback loop knob in addition to the standard volume and texture.
It's going out to kbithecrowing.

This is a Devi Soda Meiser that I put together today out of a Radioshack enclosure and spare parts. Still debating finding bend points on it for maximum chaos.


This is a Devi Aenima that I put together out of parts laying around. Has two oscillation switches, power starve, and a feedback loop knob in addition to the standard volume and texture.
It's going out to kbithecrowing.
This is a Devi Soda Meiser that I put together today out of a Radioshack enclosure and spare parts. Still debating finding bend points on it for maximum chaos.
-
zRobertez

- FAMOUS
- Posts: 1686
- Joined: Sun Apr 08, 2012 11:56 pm
- Location: Missouri
Re: Let's see your finished DIY projects!
That vibe sounds amazing! Seriously, I've like listened to it like 3 times in a row. What are the knobs on it?
http://www.facebook.com/pages/Housewife/331848200230566
http://housewifeofficial.bandcamp.com/
http://housewifeofficial.bandcamp.com/
KLON KLON KLON KLONTom Dalton wrote:Like a phoenix's butt, it will rise from the asses.
-
culturejam
- Supporter
- Posts: 2381
- Joined: Sun Jun 28, 2009 5:25 pm
- Location: Nueva Yersey
Re: Let's see your finished DIY projects!
Thanks for the kind words!zRobertez wrote:That vibe sounds amazing! Seriously, I've like listened to it like 3 times in a row. What are the knobs on it?
The two obvious pots are Speed and Depth. The third I call "Wave", and it controls the wave shape of the LFO. It goes from triangle on one end to almost square on the other. Square wave sounds cool on higher speeds, but not as useful on lower speeds (at least to me). I actually already did a V2 of the circuit, and I changed the Wave pot to a switch, because the real differences in tone really happen at the extreme settings of the pot.
Still trying to figure out what I want to do with this project.
Disclaimer #1: Co-Founder, Product Developer at Function f(x).
-
zRobertez
- FAMOUS
- Posts: 1686
- Joined: Sun Apr 08, 2012 11:56 pm
- Location: Missouri
Re: Let's see your finished DIY projects!
Oops, meant to put this in a pm 
http://www.facebook.com/pages/Housewife/331848200230566
http://housewifeofficial.bandcamp.com/
http://housewifeofficial.bandcamp.com/
KLON KLON KLON KLONTom Dalton wrote:Like a phoenix's butt, it will rise from the asses.