Forum rules
The DIY forum is for personal projects (things that are not for sale, not in production), info sharing, peer to peer assistance. No backdoor spamming (DIY posts that are actually advertisements for your business). No clones of in-production pedals. If you have concerns or questions, feel free to PM admin. Thanks so much!
I think it came out "ok" for my first time. I can't wait to try it again this weekend. Any pointers?
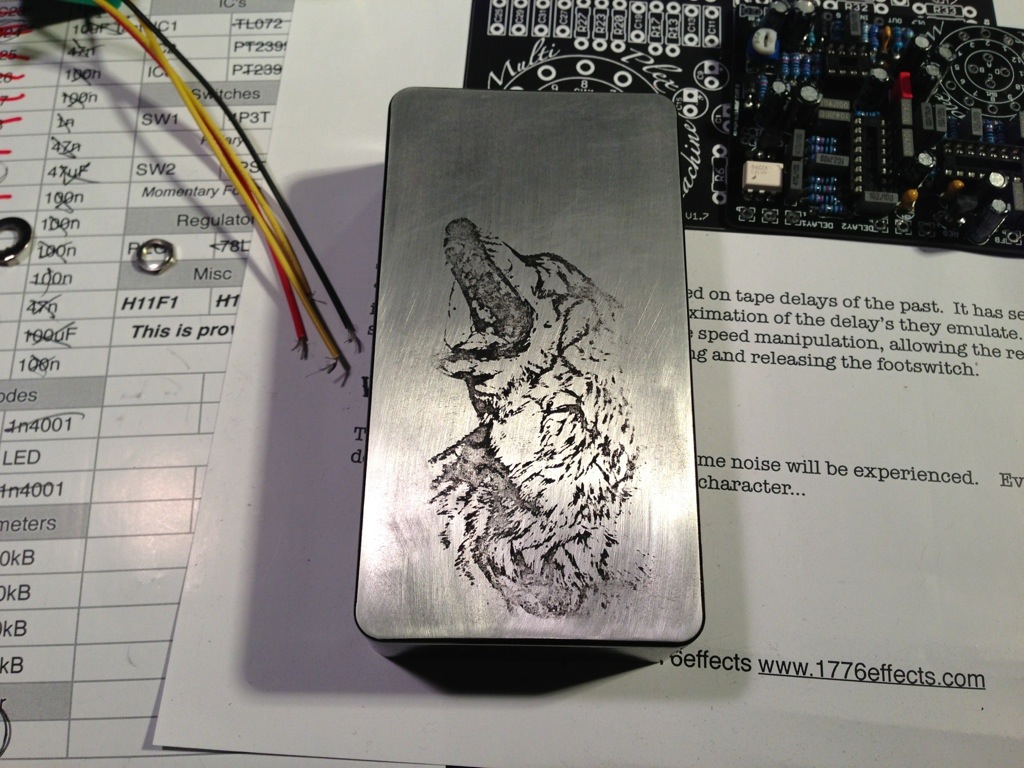
I did the toner transfer and ironed it on the enclosure and gave it a light etch bath. I think I really need to let it sit in there longer... I was just worried.
not bad at all. letting it sit too long can really screw it up so I think you made the right choice for your first etch. next time do it longer but make sure you check on it and make sure the temperature is the same as the last time.
Jaray9 wrote:That looks really cool. What kind of pedal will it become?
Thanks, not to sure at this point. It was more of a test but I think I may stick a one knob fuzz in there.
eatyourguitar wrote:not bad at all. letting it sit too long can really screw it up so I think you made the right choice for your first etch. next time do it longer but make sure you check on it and make sure the temperature is the same as the last time.
Thanks for the info.. I will try that this weekend and post my results.
Nice job! You managed to avoid the #1 problem that I have with my etches-- and I've done quite a few now. I can never avoid pitting in big masked areas, or around the edges. I've used toner, nail polish, spray paint, enamel, etc. It just never comes out perfect.
I see you sanded a painted/powder coated enclosure. I love that look. One thing to consider is using rough sandpaper to scuff the paint/powder coat to give it a matte finish. It looks pretty cool.
Looks fucking great for a 1st! The last few things I etched I used a normal sponge to wipe acid onto the enclosure.
Usually I just pour some one and let it burn making sure the acid has good coverage. That and a soft toothbrush for agitating.
The sponge works great and I'm able to "scrub" the enclosure firmly and it doesn't fuck up the toner transfer. I usually burn with acid and then stick it in a container with cool water next to the acid bath when it starts to get hot and hectic. Once it cools, back to the acid. And back and forth.
LaoWiz wrote:Looks fucking great for a 1st! The last few things I etched I used a normal sponge to wipe acid onto the enclosure.
Usually I just pour some one and let it burn making sure the acid has good coverage. That and a soft toothbrush for agitating.
The sponge works great and I'm able to "scrub" the enclosure firmly and it doesn't fuck up the toner transfer. I usually burn with acid and then stick it in a container with cool water next to the acid bath when it starts to get hot and hectic. Once it cools, back to the acid. And back and forth.
Thanks, this is what I did.
I printed the design that I inverted in Photoshop on photo paper Ironed on the image to the englosure Used a sponge to pool & wipe etchent Shot the enclosure with black paint Wet sanded the top with 600 grit paper
That looks super cool. My first etch's looked horrendous. I've never had enough heat from my iron, or maybe the exact right toner to get pnp to stick. I actually had promising results from printing b&w images with an old HP laser, directly onto duraseal. Might be called something different in your country.. The last step was to trace the outline of the black parts in the image with the tip of a hot soldering iron. If done well, an adhesive chem-resistant stencil can be made. Bloody time consuming though, and helps if you're good at drawing. After doing the front plate, the rest can be sealed by overlapping more duraseal to protect the sides when facedown in the bath. No paint required


")
