Page 385 of 409
Re: Let's see your finished DIY projects!
Posted: Tue Jun 11, 2019 3:10 am
by fuzzonaut
digi2t wrote:fuzzonaut wrote:Amazing stuff on those last few pages!
It's been raining the last two days, so I've just finished another Deadend FX PCB built. It's their take on the Silver Rose. It was quite a tight fit. I usually solder just one or two pots to the PCB and wire the rest, because I'm drilling by hand and am usually not too precise while doing it. And I usually use bigger knobs, so spacing them out is cool.
This time though, all knobs but one (Master) and the 3 switches were pcb mount, so yeah, I'm just glad I got it in there.
It works alright, but while testing it, I observed something rather baffling: when the pedal is bypassed, the mids switch (upper right) turns the pilot light off and on - but that's not all, the Mix knob (Fuzz Mix) also acts as a dimmer, meaning the light gets brighter when I turn it clockwise (to the Superfuzz side) and it goes out when I'm halfway into the muff ......
That happens no matter if I've got something plugged in or not.
Anybody got an idea what's going on there?

One of the pilot light wires touching something?
But anyway, it rips big time, so I guess I'll just leave the dimmer mod as is.

Silver-S.jpg
SilverS.jpg
Def not normal insofar as the LED is concerned.
First and foremost, I see that you're using sockets for the BS170 and 2N3904. If you're not getting good contact between the pins and sockets, then the Mill2 may act wonky, as it is now. Leave as is for now, and read on...
First, check R11. It should be 100K.
Second, what MOSFET did you use for the Mill2 bypass? I've had a bum BS170 do that to me in the past. You can sub a 2N7000 in there as well,
but you have to turn it around 180 degrees (opposite to the silkscreen outline on the PCB). Generally, either BS170 or 2N7000 will work equally well, though on rare occasions, I've had a 2N7000 work better. I generally always use 2N7000's, but that's me. Since you have sockets in there, you can test. Try another BS170, or swap in a 2N7000 instead (observe aforementioned warning in bold italic!).
Also, check to see if the diode D11 is good, use the diode function of your DMM. Ultimately, on the fringe, the transistor (2N3904) might be suspect. Again... sockets are there, so test. Just about any NPN transistor should work here.
If one of the above turns up to be the culprit, then do yourself a huge favor, remove the sockets, and solder the components directly. That applies to all your other socketed components too. Sockets are OK for testing and/or auditioning, but once you've made your ultimate choices, save yourself from a shitload of headaches, and solder them in direct.
Thanks for all the advice! I'll go through these points.
It's a BS170 - I should have another one.
(I also noticed later on, that whether this is happening or not also depends on the position of the Presence switch.)
Re: Let's see your finished DIY projects!
Posted: Tue Jun 11, 2019 1:04 pm
by digi2t
Your issue raised my concern, as such, I ducked down to the studio last night and fiddled with mine. As I mentioned before, I used a 2N7000 in place of the BS170, but I have no such issues, regardless of what switches or knobs I play with. In bypass, the LED stays off.
First, try another MOSFET. Speaking of which, where did you source the BS170? If the answer is "China", then there may be some doubt of the component. If that doesn't do it...
If you look at the schematic, the presence switch and pot are upstream of the Mill2 bypass. Theretically, R11 (100K) should be providing enough ground reference for the bypass scheme to turn off the LED and keep it off, but in this case, it isn't. Perhaps reflow the solder here. A cold joint here may provide enough ground lift to mess with the bypass scheme.
Re: Let's see your finished DIY projects!
Posted: Tue Jun 11, 2019 1:17 pm
by fuzzonaut
Thanks again for all the advice and even the concern!

I'll have a closer look soon - also at the schematic. I was too knackered yesterday to even try to wrap my head around any of this.
I get my parts mainly from Musikding, sometimes from Banzai. I'll get some 2N7000s with my next order.
Re: Let's see your finished DIY projects!
Posted: Tue Jun 11, 2019 6:31 pm
by frodog
LaoWiz wrote:frodog wrote:That's some interesting stuff man, and I'll also add my praise for your etched finishes, they look so unique and just.. hard, like a gentle giant killer robot.
Yesterday I housed this Soul Kitchen Heavy Darling circuit from a while back, in this antenna junction box I think it was, that's also been just laying around. Whenever I've had the inkling aluminum foil has been added to the inside, so it's pretty well shielded whatever that's worth.
Thank you, that Heavy Darling is a super old school DIY stomp circuit, yes?
Yep, credit to Dragonfly. I understand the name Heavy Darling(ton) but I don't know where the SoulKitchen moniker has come from. Is that also him? Regardless, it's a cool-ass, easy-to-build fuzz. Can see myself using it in for a '60s type sound e.g. It cuts well in a band setting too.
Here's a Rebote delay I built, with an LDR for modulation. Upped some of the cap values and a couple resistors, selected a non-clipping chip+jfet and it sounds really nice, even does a light boost with the fb/mix (acid) off. Rain is the time, it was supposed to be the other way around but still fits, as you turn up the time those rainclouds of noise appear. Below noon it's
very passably clean. It does not self-oscillate is the only drawback but I don't really mind.
Oh yeah and this is a delay
er, not just a regular delay. As far as I could find nobody had used that name before, or maybe they threw it around the boardroom and thought it sounded stupid, so I'm claiming that
.Every PT2399 thing I make from now on is gonna be something-something DELAYER.
Re: Let's see your finished DIY projects!
Posted: Wed Jun 12, 2019 1:36 pm
by hbombgraphics
that's a really cool looking build
like the finish
and the name "delayer"
I don't recall seeing that on anything
Re: Let's see your finished DIY projects!
Posted: Wed Jun 12, 2019 10:06 pm
by frodog
Thank you. Think I may just have made the first delayer ever!
Of course i jest, anyone is free to use the description of what a delay chip does, but I felt like a real clever boy when I thought of that.
Re: Let's see your finished DIY projects!
Posted: Wed Jun 19, 2019 3:35 pm
by UglyCasanova
Re: Let's see your finished DIY projects!
Posted: Sun Jun 23, 2019 2:30 am
by codetocontra
Hawt. Nice work.
Re: Let's see your finished DIY projects!
Posted: Sun Jun 23, 2019 4:13 pm
by cloudscapes
oh! killer!
Re: Let's see your finished DIY projects!
Posted: Sun Jun 23, 2019 6:14 pm
by frodog
Thanks UC and holy smokes, your effect thingy looks hella nice! And seems like it makes some unique sounds as well, look forward to hearing it.
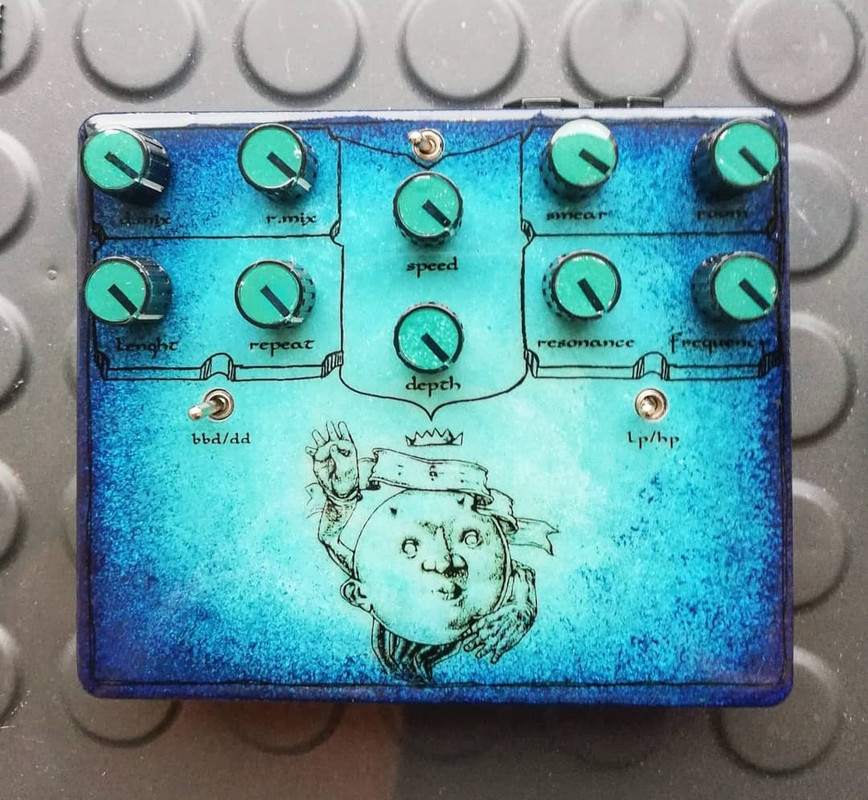
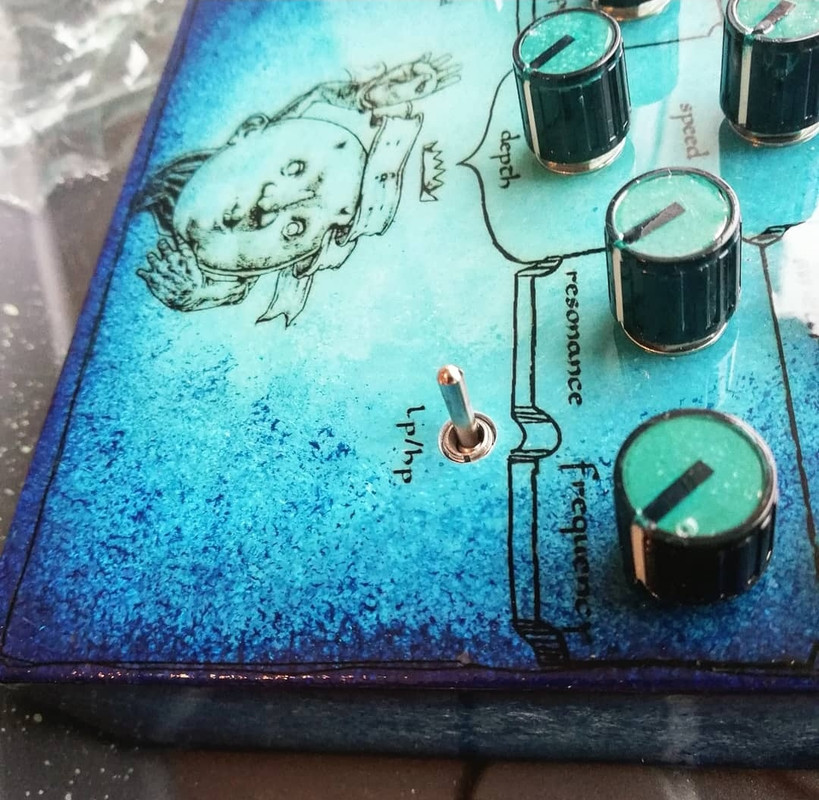
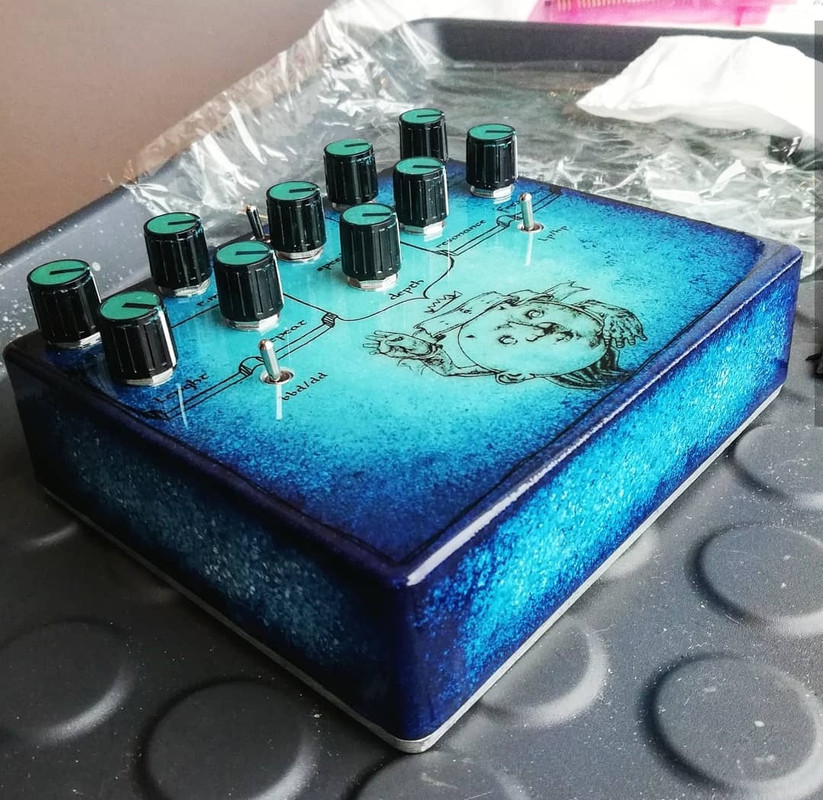
Here's a clone of the Ghost Effects Lunar Incantation. The vero was cut to be a Catalinbread Merkin, but as I was breadboarding that and other Fuzzrite-type circuits, the Lunar Incantation variant won out and it was adapted as such. Went through a bunch of BC108Bs from three different manufacturers until I found a nice pair. Definitely a lot of variation possible, I'd love to someday own a real unit.
Finish is old stock Citadel Color green/armor wash rivers with gold paint pen and matte clearcoat. Two rare NOS knobs (Spooky Tooth anyone?) seemed appropriate.
Re: Let's see your finished DIY projects!
Posted: Sun Jun 23, 2019 7:06 pm
by BetterOffShred
Citadel washes up in this bitch... bout to get some Grimdark on. Lunar incantation is great. I built one too hehe. Great build dude
")
Re: Let's see your finished DIY projects!
Posted: Sun Jun 23, 2019 11:34 pm
by cloudscapes
I finished this thing
simple video tomorrow maybe
Re: Let's see your finished DIY projects!
Posted: Mon Jun 24, 2019 12:47 am
by kosta
Damn dude. Casually dropping that in the mix with no explanation. KABOOM. (Looks awesome!)
Re: Let's see your finished DIY projects!
Posted: Mon Jun 24, 2019 7:47 pm
by cloudscapes
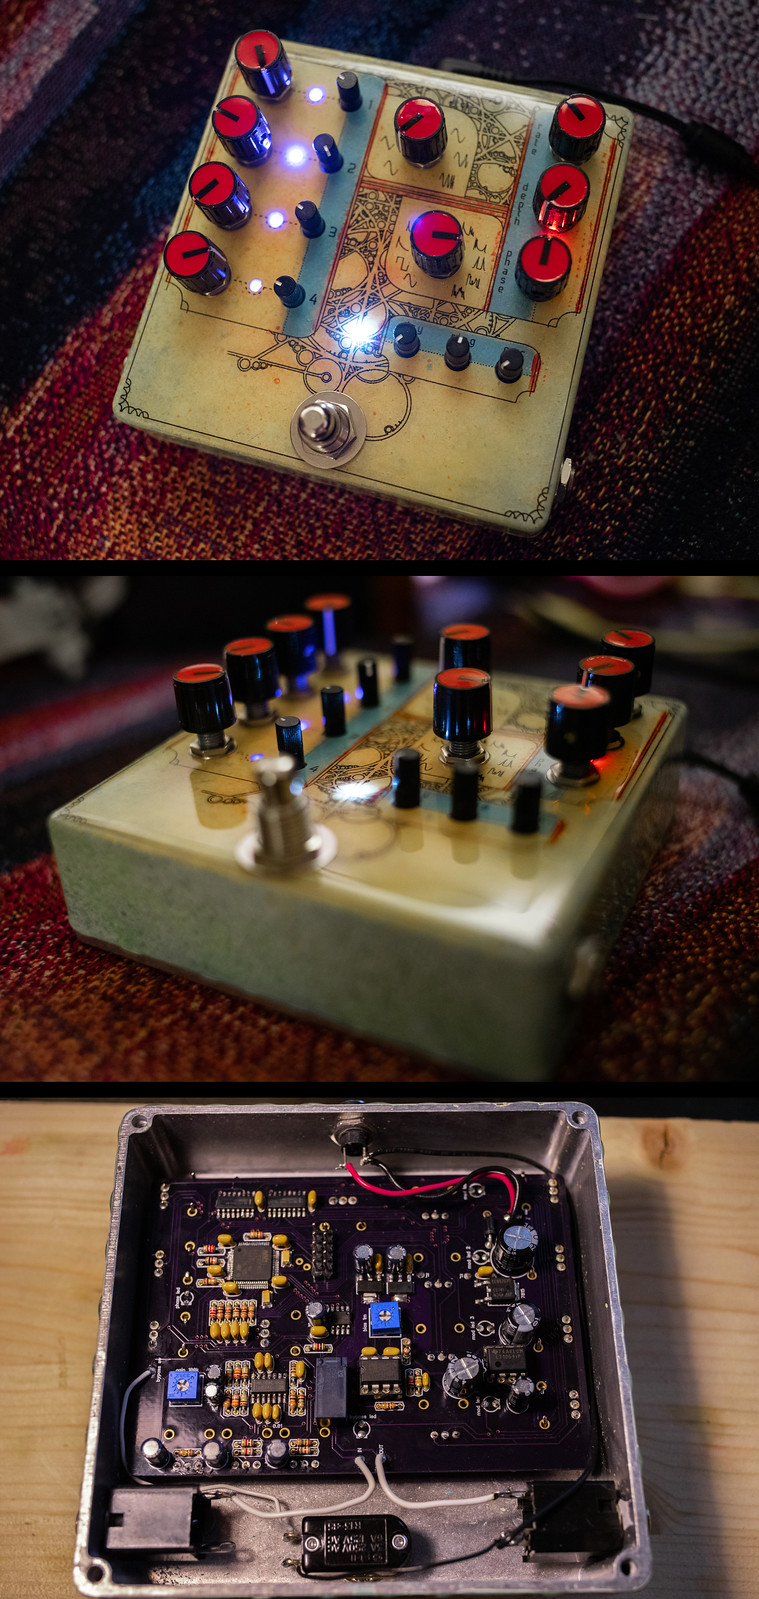
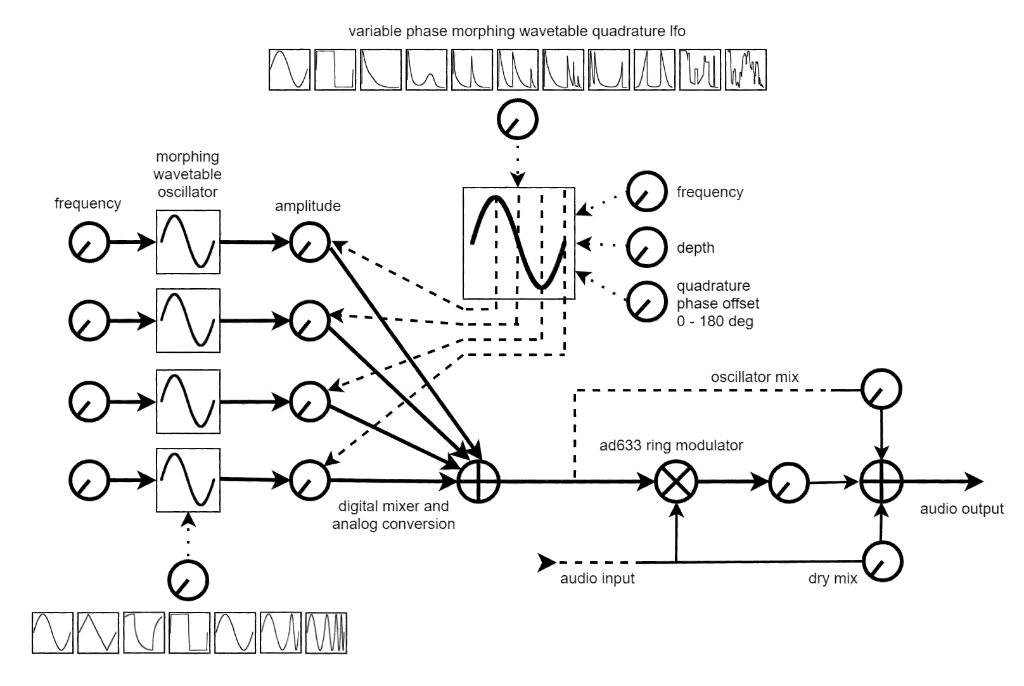
Its a digitally-controlled analog ringmod. The beefy charge pump power stuff on the right side of the board for the ad633.
There's a bunch of kinds of modulation going on! It's a ringmod, but there are 4 carrier oscillators instead of one. I can modulate their amplitude with a quadrature lfo. So at any given time, the first oscillator is modulated by the lfo normally, the second modulated by the lfo+25% phase, the third by lfo+50% phase, and fourth by lfo+75% phase. It makes for a much more organic "sequenced" ringmod where tones smoothly blend between each-other and often are played simultaneously. Sequenced polyphony in a way. I can vary the phase which is super cool! With the phase dialed lower I get a neat church-bell sequence with a long pause. With phase dialed higher the last oscillator starts overlapping the first and I get an interesting 3/4 sequence with the first doubling up with the last! I'm not locked to quarter phase offset either, it's smooth shifting on the fly.
It's my first project using arm. And I'm also working towards designing a digital/analog hybrid polysynth so I wanted a simpler project to learn arm and make a neat wavetable engine! The wavetables are 10bit (probably overkill), drawn in inkscape/photoshop. The oscillators/lfo interpolate between table samples, as well as interpolating/blending between tables.
I made this diagram:
Re: Let's see your finished DIY projects!
Posted: Mon Jun 24, 2019 10:35 pm
by jrfox92
cloudscapes wrote:Its a digitally-controlled analog ringmod.
Waiting to hear about the Sonic Crayon x Chase Bliss collab in the future.

")