Page 359 of 409
Re: Let's see your finished DIY projects!
Posted: Wed Mar 07, 2018 10:56 am
by BetterOffShred
Looks great Jero, you should share with us your painting technique. I like it, and I'd love to try it out.
My noise ensemble ended up being 3 pots, I lifted the 47k (if memory serves) nd added a 500k which normalized the repeats as you turn it up (I chose down, because I wanted to turn up the crazy) and then I put in a feedback loop momentary stomp.
Re: Let's see your finished DIY projects!
Posted: Thu Mar 08, 2018 6:20 pm
by Jero
BetterOffShred wrote:Looks great Jero, you should share with us your painting technique. I like it, and I'd love to try it out.
My noise ensemble ended up being 3 pots, I lifted the 47k (if memory serves) nd added a 500k which normalized the repeats as you turn it up (I chose down, because I wanted to turn up the crazy) and then I put in a feedback loop momentary stomp.
Thanks! I use alcohol inks a lot these days, and just apply in various manners. Try to experiment. A lot of my early builds were literally set on fire while painting.
That seems to be the popular route to go with the Noise Ensemble. Something along those lines. Bad Comrade'ish. I have some ideas for an expanded one I might do down the road. Looks like skully is doing something similar...Dirge - Slowly Melting (pretty sick!)
Here are two more enclosures I did around the same time...


Re: Let's see your finished DIY projects!
Posted: Thu Mar 08, 2018 9:27 pm
by BetterOffShred
Badass. I will have to watch a few YouTube videos on alcohol inks. Thanks
")
Re: Let's see your finished DIY projects!
Posted: Thu Mar 08, 2018 9:33 pm
by comesect2.0
this looks so fun jero.
Re: Let's see your finished DIY projects!
Posted: Thu Mar 08, 2018 10:27 pm
by ibarakishi
comesect2.0 wrote:
this looks so fun jero.
explain this to me
Re: Let's see your finished DIY projects!
Posted: Thu Mar 08, 2018 11:25 pm
by Jero
ibarakishi wrote:comesect2.0 wrote:
this looks so fun jero.
explain this to me

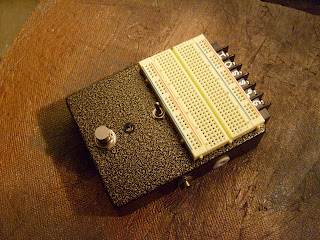
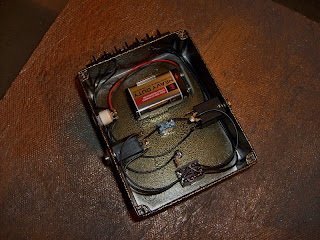
where'd you find that? I made mayyybe 4-5 of those for sale/trade. I'm still using one of my first ones, though the breadboard has been replaced.
They were made for prototyping circuits easily

Re: Let's see your finished DIY projects!
Posted: Sun Mar 11, 2018 6:05 pm
by SoaringTortoise
A stereo Trem-O-Graph. Try listening with headphones.
[youtube]http://www.youtube.com/watch?v=Od1Cm0ekGwQ[/youtube]
Re: Let's see your finished DIY projects!
Posted: Mon Mar 12, 2018 4:11 pm
by spacelordmother
I really need to build one of those proto boxes. Trying to test a pedal with spaghetti pots flying everywhere is such a pain!
Simple diy project, but saved me a lot of trouble:

Blofeld had a wobbly volume pot (Waldorf skimped) so I cut a custom press-fit bushing to hold it in place. Works great, and no worries of burning out smd components trying to desolder it.

Re: Let's see your finished DIY projects!
Posted: Sun Mar 18, 2018 3:07 pm
by Dr. Sherman Sticks M.D.
finished up a lil g for myself this morning. grape paint kinda melted thru when i did the clear. i really like how it came out tho
tanooki suit deluxe
3 channel mixer with fx send/return...

- 2018-03-18 14.51.29.jpg (322.46 KiB) Viewed 5502 times
- 2018-03-18 14.53.16.jpg (323.08 KiB) Viewed 5502 times

- 2018-03-18 14.53.48.jpg (337.07 KiB) Viewed 5502 times
Re: Let's see your finished DIY projects!
Posted: Sun Mar 18, 2018 3:26 pm
by frodog
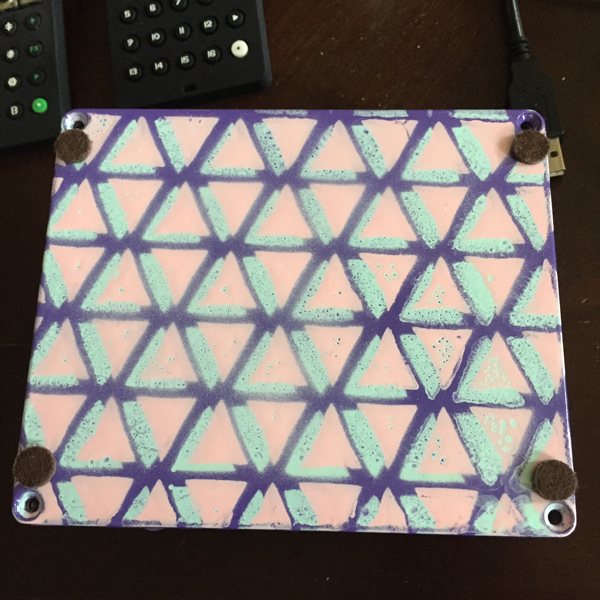
Damn, that mixer looks amazing Doc! So clean inside and the aesthetic is mega fly, very 3D. I also dig that prototyping box Jero, so practical. And cool alcohol inkage! Wanna try that method soon, as I've found painting enclosures to be a long process...
Whew, SFD finally finished. After grinding/sanding off the first paintjob because the clearcoat (probably too thick on the box face) had a bad reaction and bubbled... My first design looked pretty much the same as this, except with the S and F trading places, suggesting maybe a name like Fucking Sick Drive.
The letters I made with linoleum cut stamps. Of course couldn't apply them perfectly, so the distressed look just did itself. I changed/simplified the knob titles and painted them with silver paint. Base is grey, with some of the first finish showing through (esp on the sides), the splatter is courtesy of old black spray can, then stamps with white/silver mixed email paint. Finished with three coats of a new matte clear coat I like much better than the gloss.
Inside, the wiring was a tight job, but it fit snugly into this (foil insulated) 1590b. I had measured, brained and drilled very carefully, but of course ONE simple thing gave me trouble: Due to the jacks being very close to the bottom lid, the orientation u see in the pic grounded at least the out jack, thus making no sound. Opening it up again and rotating the jack positions fixed it, but I'll go back and do some groovy filing on the lid later.
Transistor-wise I used sockets and tried out a 2n2222a (the dull metal one) in Q2 (Q1 is 2907a) which I liked. Finally, I used a 3904 instead of MPSA18, just because I have a lot of those and I thought it maybe sounded less bassy, idk. The sound is very gritty and pleasing to my ears (it's set about the same as the first pic), the description MAE gives (splatty, octave-y) is spot on, but still vague enough so I didn't have any particular expectations but good inklings. It does things none of my other dirts do, while still fitting in nicely (using it as a post-everything dirt). I think this will stay on my board for a good while.
Re: Let's see your finished DIY projects!
Posted: Thu Mar 22, 2018 2:34 pm
by culturejam
^^ That's awesome!
Re: Let's see your finished DIY projects!
Posted: Thu Mar 22, 2018 2:36 pm
by AZX309
frodog wrote:
Whew, SFD finally finished.
Inside, the wiring was a tight job, but it fit snugly into this (foil insulated) 1590b. I had measured, brained and drilled very carefully, but of course ONE simple thing gave me trouble: Due to the jacks being very close to the bottom lid, the orientation u see in the pic grounded at least the out jack, thus making no sound. Opening it up again and rotating the jack positions fixed it, but I'll go back and do some groovy filing on the lid later.
Transistor-wise I used sockets and tried out a 2n2222a (the dull metal one) in Q2 (Q1 is 2907a) which I liked. Finally, I used a 3904 instead of MPSA18, just because I have a lot of those and I thought it maybe sounded less bassy, idk. The sound is very gritty and pleasing to my ears (it's set about the same as the first pic), the description MAE gives (splatty, octave-y) is spot on, but still vague enough so I didn't have any particular expectations but good inklings. It does things none of my other dirts do, while still fitting in nicely (using it as a post-everything dirt). I think this will stay on my board for a good while.
SFD0.JPG
SFD.JPG
inSFDe.JPG

Bravo for fitting it in a 1590b! Q3 is just an output booster, any NPN transistor will work. I like the MPSA18 because I have ton of them.
Did you end up using a 2.2M for R2? I tried a 2N2222/2N2907 and it didn't really give me anything special in the SFD while i have had great success with it in other peals.
Re: Let's see your finished DIY projects!
Posted: Thu Mar 22, 2018 4:53 pm
by cherler

So this is an oscillating fuzz based on a cascode circuit I've been working on. It can do that glitchy sub-octave ish thing so I've been having a great time!
Re: Let's see your finished DIY projects!
Posted: Fri Mar 23, 2018 7:10 pm
by frodog
AZX309 wrote: Bravo for fitting it in a 1590b! Q3 is just an output booster, any NPN transistor will work. I like the MPSA18 because I have ton of them.
Did you end up using a 2.2M for R2? I tried a 2N2222/2N2907 and it didn't really give me anything special in the SFD while i have had great success with it in other peals.
Thanks! Props to you for making the PCB so easy to work with! Its width fits exactly in that enclosure, had I not put foil pieces on the sides internally I could have even gotten it level but it doesn't matter.
I put in the resistors first, using the exact values on the b.o.m, so yes it was a 2.2m. I find it has more than enough volume now, and the gain is at a good, high-ish level. Turning the lows down/ccw makes it more open and up/cw it really brings in the rumble. With bass there is a pwm-like phasing/compression that happens dynamically, wish I could demo it but I don't have the time or editing software right now.
And damn, cool pedal cherler! Glitchy sub-octave is awesome.
Re: Let's see your finished DIY projects!
Posted: Fri Mar 23, 2018 7:34 pm
by Chankgeez
This page.
