Page 358 of 409
Re: Let's see your finished DIY projects!
Posted: Sun Feb 18, 2018 11:22 am
by Chankgeez
Re: Let's see your finished DIY projects!
Posted: Sun Feb 18, 2018 11:26 am
by frodog
Thanks man!
")
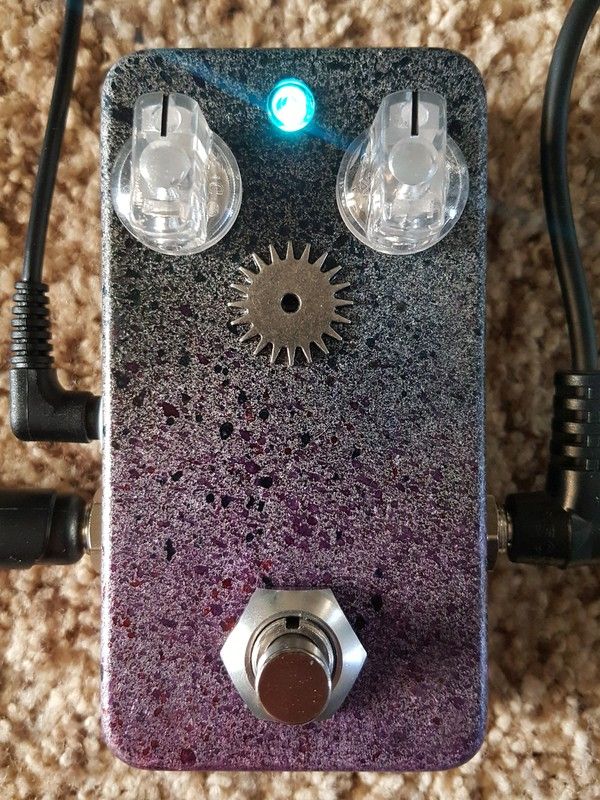
To be honest this was a bitch to paint. I basically sat with the box in my lap, various old and new paints and tiny brushes in front of me, just smoking doobs all night, hunched over, trying not to slip up (luckily I don't have much else to do). The "liche purple" miniature paint from the '90s especially got lumpy fast, and you can see the "T-Amp" writing is not perfectly straight. Also the first layer of clearcoat ate right through a patch of paint under the "P".
It's alright though, I didn't expect to get a perfect result the way I did it... Next enclosure I'll do simpler, just a lino cut stamp job right on the base coat.
Re: Let's see your finished DIY projects!
Posted: Tue Feb 20, 2018 9:10 pm
by AZX309
frodog wrote:First finished pedal y'all. T-Amp PCB from Mask Audio Electronics. An easy build which I did in parallel with three other circuits (yet-to-be-boxed). Of course the enclosure was the most time-consuming. I drilled, sanded and washed it, then sprayed it with a grey base coat, then pink (sanded), then painted it with various model paints I had lying around, and finished it with like 5-6 coats of clearcoat.
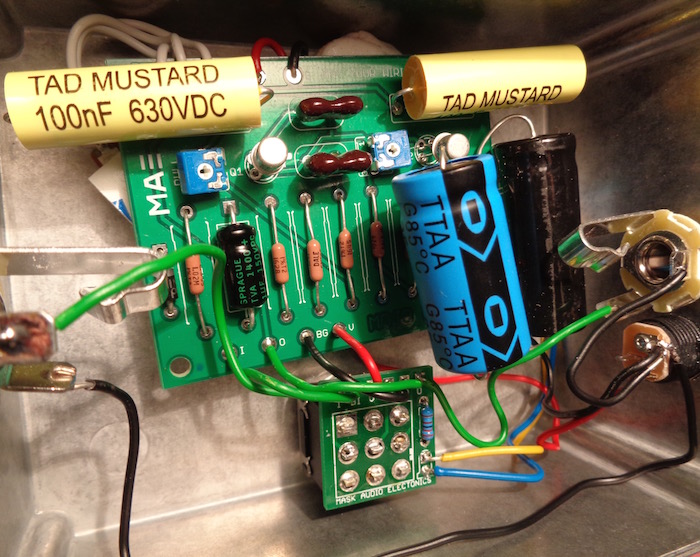
The inside looks a bit rough but everything works. Had to mount the short-legged pot above the PCB with some solid copper phone wire. Fitting the LED was among the more difficult things, it's a big one and wouldn't fit under the circuit board as I had hoped (guess I could have mounted it sideways). I used one of those transparent round LEGO "lights" as a bezel (need to lacquer the top, that sunken hole is gonna collect dirt) and Sugru mouldable glue holds it in place. Floating 5.6k resistor for extra dimness.
Oh, and it sounds great! Can't wait to box up the SFD next (also from MAE).
t-amp.JPG
t-amp_guts.JPG
wow that turned out stunning!
Re: Let's see your finished DIY projects!
Posted: Tue Feb 20, 2018 9:51 pm
by BetterOffShred
frodog wrote:Thanks man!
To be honest this was a bitch to paint. I basically sat with the box in my lap, various old and new paints and tiny brushes in front of me, just smoking doobs all night, hunched over, trying not to slip up (luckily I don't have much else to do). The "liche purple" miniature paint from the '90s especially got lumpy fast, and you can see the "T-Amp" writing is not perfectly straight. Also the first layer of clearcoat ate right through a patch of paint under the "P".
It's alright though, I didn't expect to get a perfect result the way I did it... Next enclosure I'll do simpler, just a lino cut stamp job right on the base coat.
Games workshop paints are so good though.. they last forever. Looks great man
Re: Let's see your finished DIY projects!
Posted: Mon Feb 26, 2018 8:38 am
by fuzzonaut
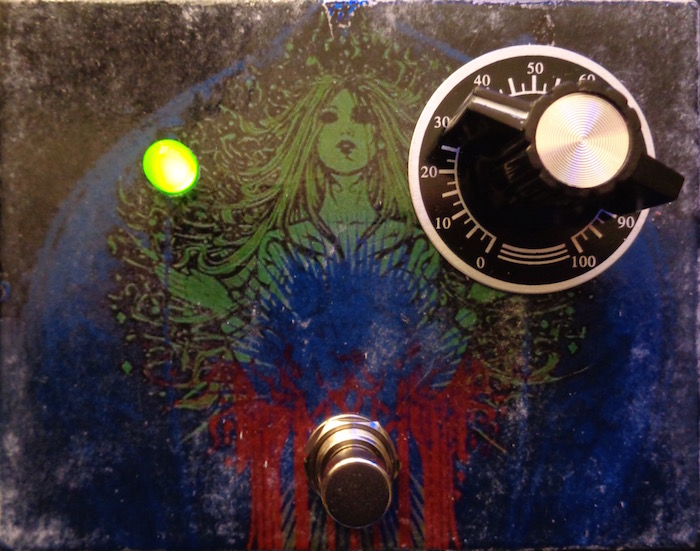
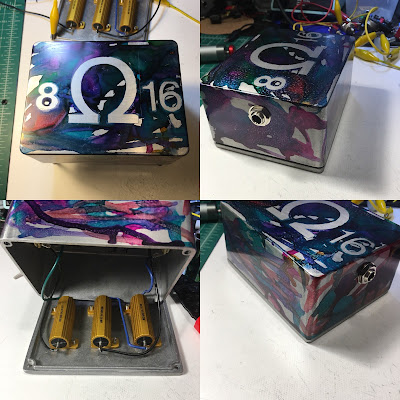
I finished the Mojo Dust last weekend (MAE rules by the way, but y'all know that). Sounds great on bass!
Well,
*cough*, I also got a bit carried away with some the the caps, ....

But hey, this is about large components, innit?

- DSC05699.jpg (161.65 KiB) Viewed 6252 times
- DSC05717.jpg (135.04 KiB) Viewed 6252 times
Now, I'm ready to go back to troubleshooting that other mess.
Re: Let's see your finished DIY projects!
Posted: Mon Feb 26, 2018 9:13 am
by frodog
BetterOffShred wrote:frodog wrote:Thanks man!
To be honest this was a bitch to paint. I basically sat with the box in my lap, various old and new paints and tiny brushes in front of me, just smoking doobs all night, hunched over, trying not to slip up (luckily I don't have much else to do). The "liche purple" miniature paint from the '90s especially got lumpy fast, and you can see the "T-Amp" writing is not perfectly straight. Also the first layer of clearcoat ate right through a patch of paint under the "P".
It's alright though, I didn't expect to get a perfect result the way I did it... Next enclosure I'll do simpler, just a lino cut stamp job right on the base coat.
Games workshop paints are so good though.. they last forever. Looks great man
Thanks peeps! And yeah, GW paints! I have some sets (like SPACE WOLVES) from back in the day that can finally be used again.
Fuzzonaut, looks awesome! Beautiful box art and big caps

Got those long-awaited JACKS today, so now it's SFD assembly time!
Re: Let's see your finished DIY projects!
Posted: Mon Feb 26, 2018 9:30 am
by MechaGodzilla
fuzzonaut wrote:I finished the Mojo Dust last weekend (MAE rules by the way, but y'all know that). Sounds great on bass!
Well,
*cough*, I also got a bit carried away with some the the caps, ....
But hey, this is about large components, innit?
DSC05717.jpg
Now, I'm ready to go back to troubleshooting that other mess.
that's gorgeous
Re: Let's see your finished DIY projects!
Posted: Mon Feb 26, 2018 10:41 am
by fuzzonaut
Cheers guys!
Re: Let's see your finished DIY projects!
Posted: Mon Feb 26, 2018 2:26 pm
by AZX309
fuzzonaut wrote:I finished the Mojo Dust last weekend (MAE rules by the way, but y'all know that). Sounds great on bass!
Well,
*cough*, I also got a bit carried away with some the the caps, ....
But hey, this is about large components, innit?
DSC05699.jpg
DSC05717.jpg
Now, I'm ready to go back to troubleshooting that other mess.
Well that is the whole point. Those caps are amazing!
Re: Let's see your finished DIY projects!
Posted: Mon Feb 26, 2018 2:27 pm
by Kacey Y
I need to know...exactly how much mustard are those caps?
Re: Let's see your finished DIY projects!
Posted: Mon Feb 26, 2018 2:42 pm
by BetterOffShred
Corey Y wrote:I need to know...exactly how much mustard are those caps?
Just a.."TAD"..
Re: Let's see your finished DIY projects!
Posted: Mon Feb 26, 2018 2:52 pm
by Kacey Y
BetterOffShred wrote:
Just a.."TAD"..

Re: Let's see your finished DIY projects!
Posted: Wed Feb 28, 2018 12:22 am
by frodog
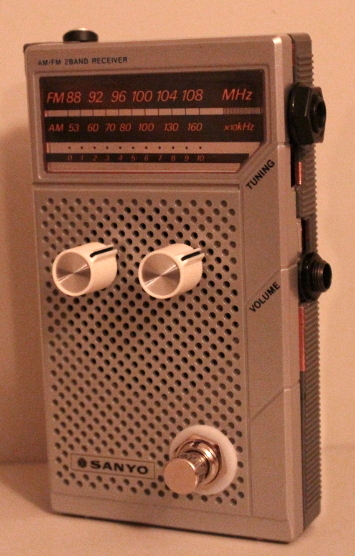
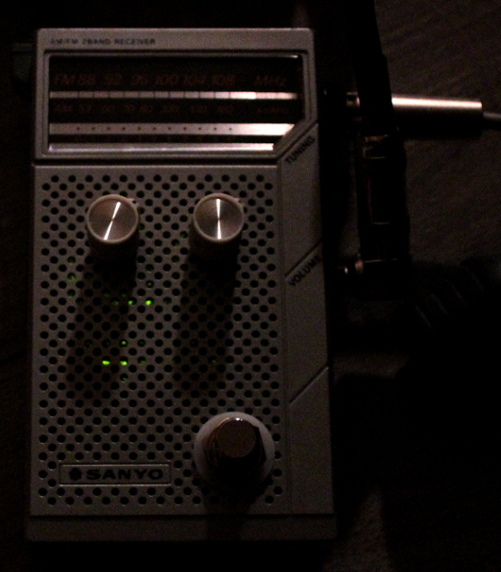
Another thing I made while waiting for enclosures. This is a Devi Ever Electric Brown clone from lvlark I think, found at tagboardeffects. Built on some ridiculously narrow, centre-divided stripboard. Started with the intention of putting a Hyperion into this NOS Sanyo pocket radio (which I gutted and got some wire and diodes from), but that circuit gave me some problems. It worked at first but was very noisy, then I fixed it, then un-fixed it, tried to go back... in the process the board became useless so I just tore it apart and re-used some of the parts in a simpler circuit. Electric Brown, two transistor drive. Will get back to the Hyperion another time.
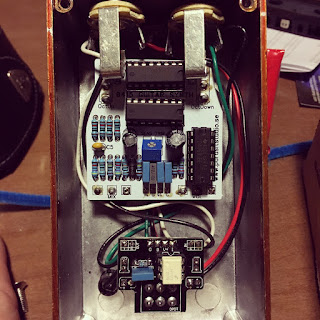
I'll try to get some gutshots here later, when that sugru holding the jacks + board dries. There's copper foil all over the inside, the circuit sits right by the tip of the enclosed top/in jack, under the radio dial faceplate. The LED is super weak because of some resistor misguidedness - you can just about see it through the speaker grill holes when it's dark, reflecting off the copper.
I don't see this getting used much, it was more a novelty project to see if it was worth putting something in such a box, but it seems solid enough so far and I actually really like the sound. Can get blown-out fuzz but is also touch sensitive in a cool, brown way.
- electric_brown_sanyo_2.JPG (214.87 KiB) Viewed 6163 times
- eb_s_light.JPG (208.74 KiB) Viewed 6173 times
And this is what it looks like inside. I cut/broke off the bits of plastic that were in the way with pliers, to make slots for the switch wiring and jacks, which sit securely between the bottom and lid when closed. Probably spent the most time on the "shielding", don't even know if it makes a huge difference but it was fun to do.
Re: Let's see your finished DIY projects!
Posted: Thu Mar 01, 2018 2:17 am
by flanagan0718
Here are a few I finished in the recent past
Dummy load box
Parasit Studio 0415 for Pray For Sound
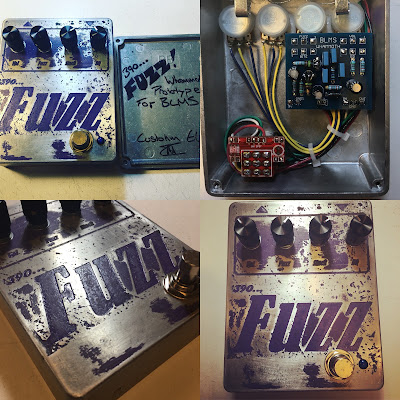
390...FUZZ Prototype for Bitches Love My Switches (PCBs now available on BLMS site)
Re: Let's see your finished DIY projects!
Posted: Tue Mar 06, 2018 10:26 pm
by Jero
Some really cool stuff on this last page! I'm going to have to go back and catch up on all the builds I've missed

Here's a pretty standard Noise Ensemble I did recently...(labels on the side/front)