Page 2 of 3
Re: Blues Jr head project
Posted: Sat Aug 13, 2016 4:18 pm
by Adamadamadam
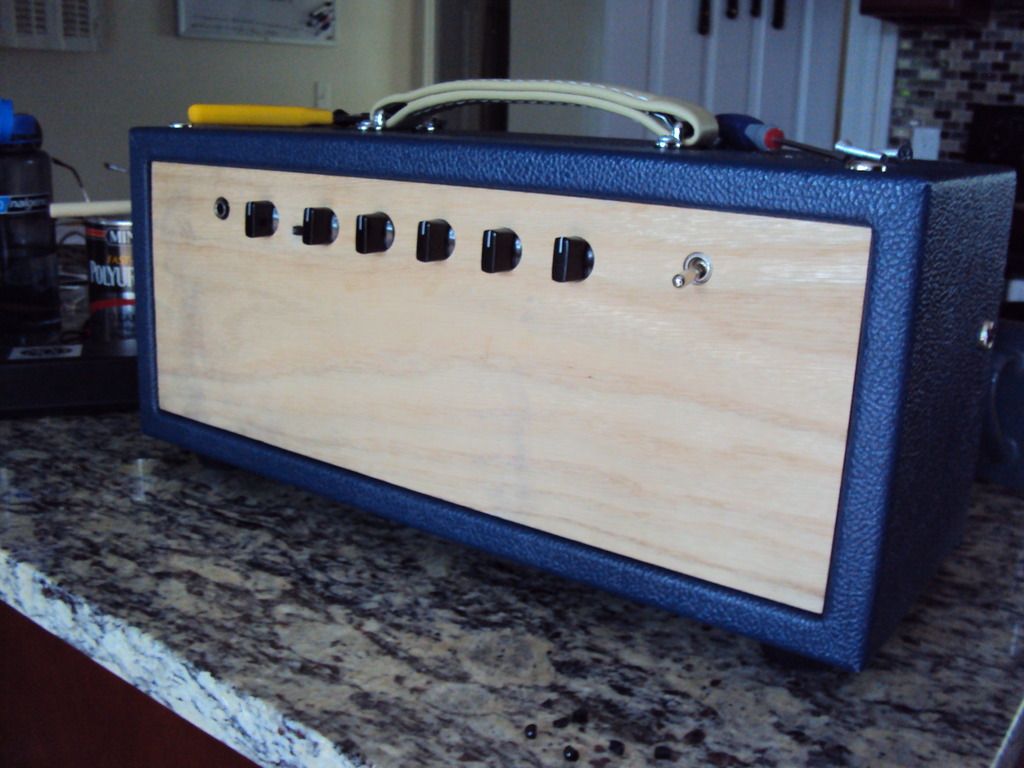
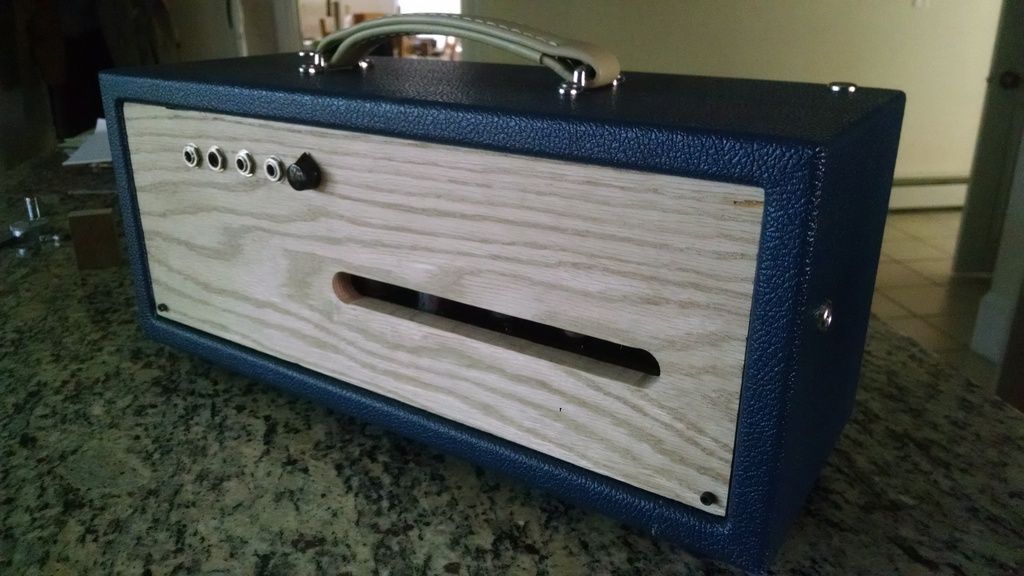
I'm on my way out the door so I can't stay and chat, but I'll just leave this here for now.
Still lots to do. The oak looks darker IRL.
Re: Blues Jr head project
Posted: Mon Aug 15, 2016 12:35 pm
by JonnyAngle
8====>
Re: Blues Jr head project
Posted: Mon Aug 15, 2016 12:40 pm
by D.o.S.
JonnyAngle wrote:8====>
……………………„„-~^^~„-„„_
………………„-^*'' : : „'' : : : : *-„
…………..„-* : : :„„--/ : : : : : : : '\
…………./ : : „-* . .| : : : : : : : : '|
……….../ : „-* . . . | : : : : : : : : |
………...\„-* . . . . .| : : : : : : : :'|
……….../ . . . . . . '| : : : : : : : :|
……..../ . . . . . . . .'\ : : : : : : : |
……../ . . . . . . . . . .\ : : : : : : :|
……./ . . . . . . . . . . . '\ : : : : : /
….../ . . . . . . . . . . . . . *-„„„„-*'
….'/ . . . . . . . . . . . . . . '|
…/ . . . . . . . ./ . . . . . . .|
../ . . . . . . . .'/ . . . . . . .'|
./ . . . . . . . . / . . . . . . .'|
'/ . . . . . . . . . . . . . . . .'|
'| . . . . . \ . . . . . . . . . .|
'| . . . . . . \„_^- „ . . . . .'|
'| . . . . . . . . .'\ .\ ./ '/ . |
| .\ . . . . . . . . . \ .'' / . '|
| . . . . . . . . . . / .'/ . . .|
| . . . . . . .| . . / ./ ./ . .|
Re: Blues Jr head project
Posted: Mon Aug 15, 2016 6:21 pm
by Adamadamadam
Thanks for the nice
words boners.
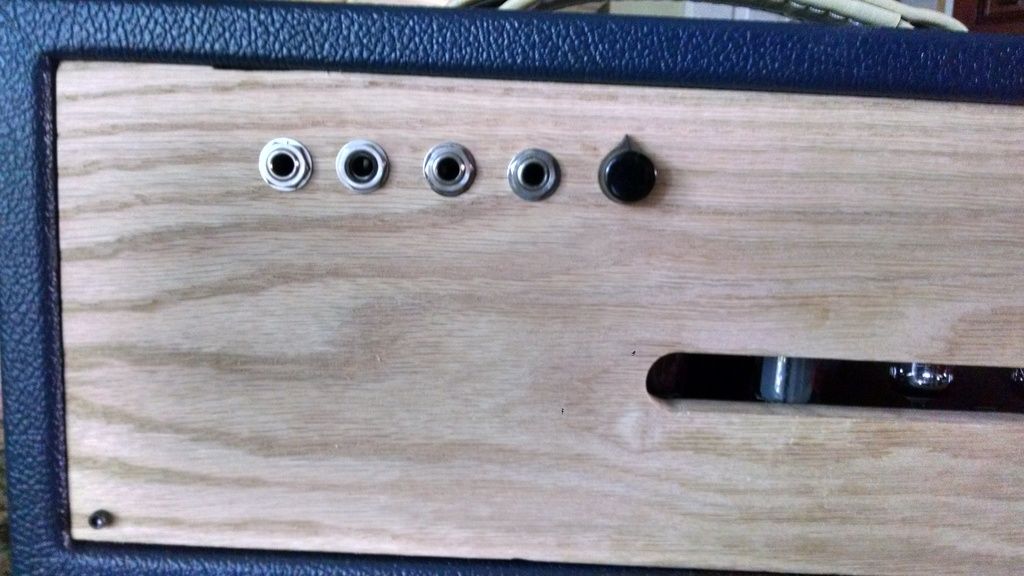
Apparently my phone takes truer-to-color photos than my point and click. Just ignore the consistently placed black dots in the right/bottom third of the image. Here's a better pic, with proper washers on the on switch and input jack.
JonnyAngle: thanks for talking me back into the continuous faceplate thing.
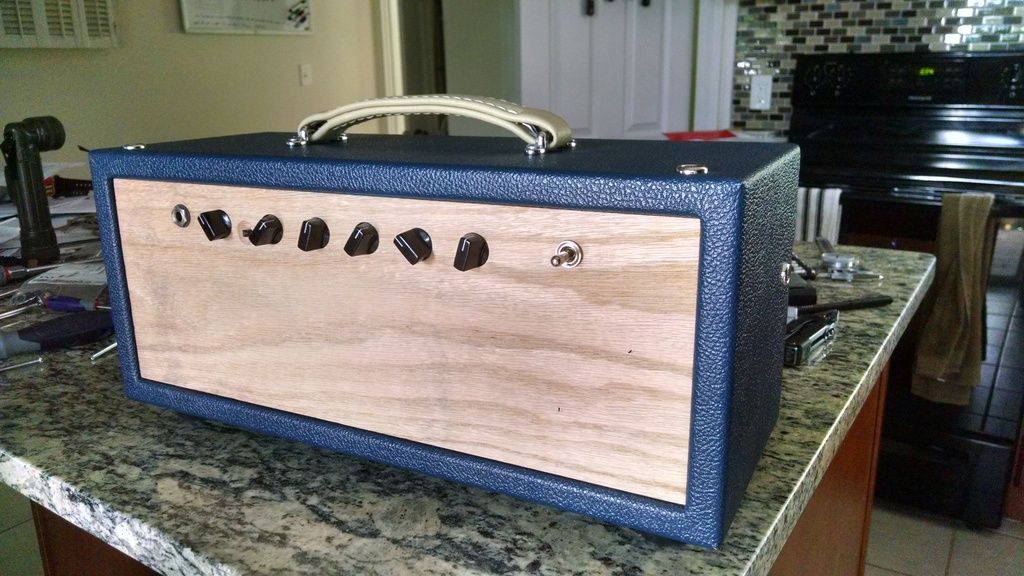
The front plate is a piece of 1x oak. Cherry ended up being a little too red, and the handle is a little too white, and as much as I love my 'Murica, it ended up looking a bit too jingoistic for my comfort. Also, if I'm ever in a position where I gig with the amp, I don't want to fend off questions about how I stole from Toby Keith's backline. Walnut would have looked rad, but I would have had to buy seven feet of 1x8. Oak was initially a compromise, but I really dig it.
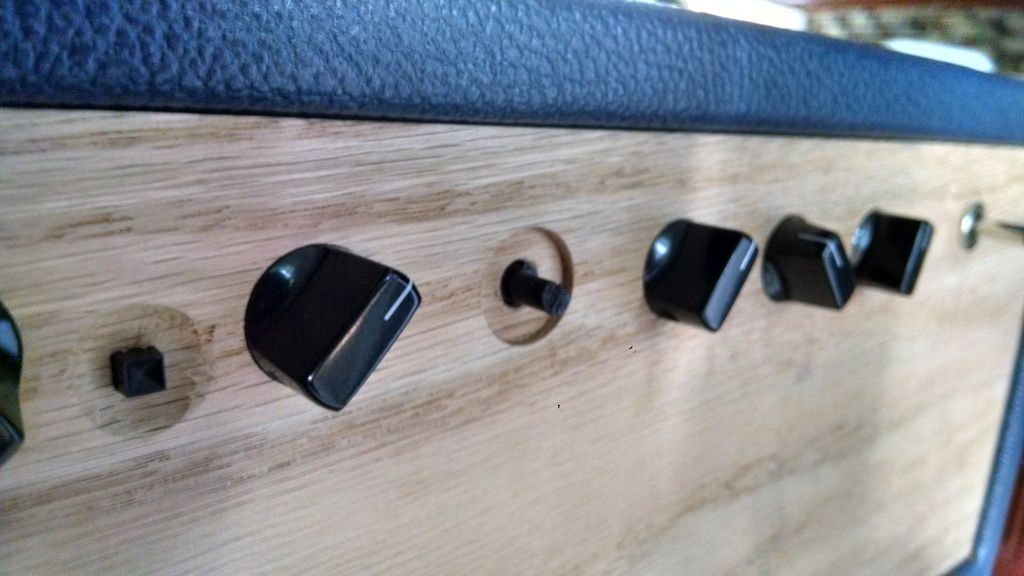
The red electrical tape around the input jack is an improvised shoulder washer. The jack's sleeve isn't long enough to use the proper switchcraft part and still be able to fix a nut in front of the faceplate. The multimeter says it works.

And are you ready for this? Counterbored knobs. I had to hack 1/8" or so off the pot ends to get them flush but a) who cares, because b) look at it.
The presence knob is now on the back of the chassis. I still haven't figured out what I want to do for the indicator, so any suggestions for interesting LED lens/mounting options are welcome. Next up: cleaning up the recess around the fat switch, mounting the front panel to the headbox, labels(?),and hitting it with a couple coats of lacquer. Later: attaching the spring tank, making a matching back panel, troubleshooting the electrical fuckups that result from dicking around with an unplugged amp for several months.
Re: Blues Jr head project
Posted: Mon Aug 15, 2016 7:37 pm
by hbombgraphics
this is flipping insane!!!!!!
that piece of oak you did is ridiculous, if you gave me 100 years and all the oak in the world I could not have figured that out.
Re: Blues Jr head project
Posted: Sat Aug 27, 2016 12:48 pm
by Adamadamadam
So my buddy comes over, sees the amp, and asks, "Is that the one you've been working on? It looks really good. What are you going to do about the plywood?"

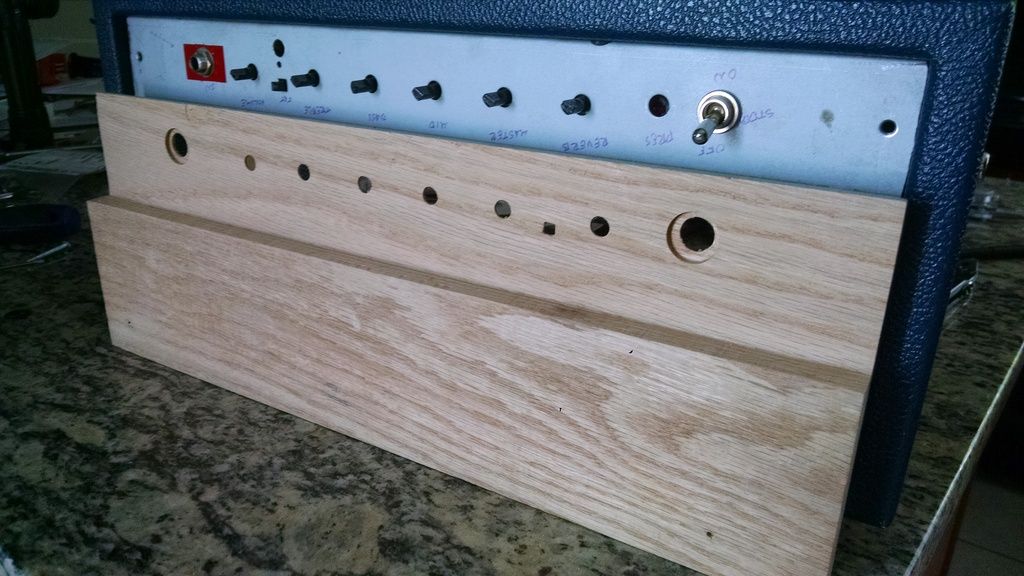
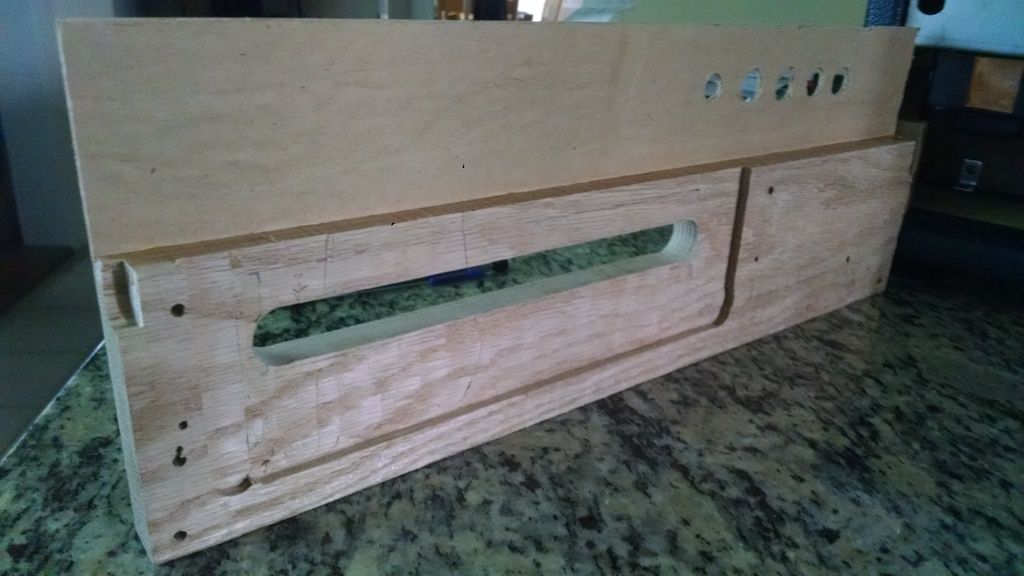
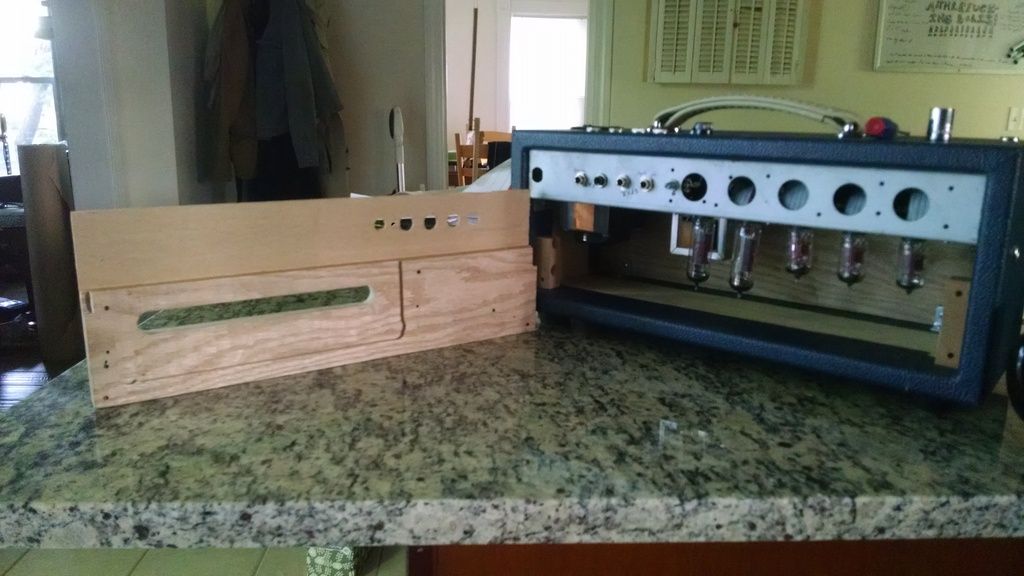
I was finally able to get some work work done. The back was a lot of one step forward, half step backwards, most of it from trying to rush. I tried to take off too much in one pass, which caused the wood to shift more than I expected, which made the cut about 1/8" deeper than I wanted it. That let to chipping, cracking, and warping, so I laminated some heavy paper to the inside, which caused more warping, and etc. It's finally as stable as it's going to get and I was mostly able to save it, but there's a chunk missing up by the jacks that does and will bug me, but not enough to re-do it. The chip in the top right should be less obvious once I've cleaned up the glue a bit more and finished it. Fingers crossed.
So the back panel, roughed out. The jacks left to right are reverb on/off, fat on/off, speaker out (8 ohm), and wildcard/future expansion opportunities/unwired. The knob is the presence control. Again, any weird little black dots are on the camera's lens, not the amp.
I still need to clean up and roundover the ventilation/viewhole, but the shaft lock on my router is having issues, so until I'm able to fix that I'm sorta' stuck.

I've worked out what should be a pretty solid strain relief for the power cord, so I can at least sort that out today. I also need to work out some sort of tube retention system. Beyond that I still need an indicator, some kind of labeling (probably(?)), and a hole in the back panel for the power cord.
Re: Blues Jr head project
Posted: Sat Aug 27, 2016 7:22 pm
by JonnyAngle
A slit like that in front would be boss
Re: Blues Jr head project
Posted: Sat Aug 27, 2016 8:20 pm
by Faldoe
Really good job with the woodwork on that that. Are you going to stain/poly coat it?
Re: Blues Jr head project
Posted: Sun Aug 28, 2016 4:44 pm
by Adamadamadam
JonnyAngle wrote:A slit like that in front would be boss
Yeah, probably. It'll depend on how I feel once the router thing is sorted out, but I also really like how clean the front looks as-is. We'll see.
Faldoe wrote:Really good job with the woodwork on that that. Are you going to stain/poly coat it?
Thanks. I'm just going to hit it with a few coats of lacquer (minwax aerosol lacquer, clear gloss) to add a bit off shine, a bit of depth, and a bit of resistance to unexpected spills, but not so much as to fill the grain.
Re: Blues Jr head project
Posted: Sun Aug 28, 2016 5:38 pm
by CyaNitrate
Ifyou have a set of letter punches, it would be cool to heat them and wood burn the labels.
Re: Blues Jr head project
Posted: Sun Aug 28, 2016 9:51 pm
by Adamadamadam
Fuck, that would look cool. But I'd need the letters, a blowtorch, and a blowtorch-resistant method of setting type. I'm most strongly leaning towards some sort of toner transfer, but I'm still just spitballing at this point.
Re: Blues Jr head project
Posted: Sun Aug 28, 2016 10:35 pm
by CyaNitrate
I think a set is les than $30, and I think I got my torch for $20? I would use a visegrip to hold it, heat it, then just press it to the wood. I would do it freehand myself, but to get a straight line you could clamp a straight strip of wood across the top to use as a guide. You'd still have to kinda eyeball the letter spacing though.
Re: Blues Jr head project
Posted: Sun Aug 28, 2016 10:36 pm
by CyaNitrate
Hell, if you have a gas stove, you could probably skip the torch.
Re: Blues Jr head project
Posted: Fri Sep 30, 2016 11:06 am
by CyaNitrate
What's the word on this? I got a line on a cheap Blies Jr, and this has me thinking of all the possibilities!
Re: Blues Jr head project
Posted: Fri Oct 14, 2016 5:24 pm
by JonnyAngle
yeah wtf?