Forum rules
The DIY forum is for personal projects (things that are not for sale, not in production), info sharing, peer to peer assistance. No backdoor spamming (DIY posts that are actually advertisements for your business). No clones of in-production pedals. If you have concerns or questions, feel free to PM admin. Thanks so much!
The guy is definetely not me, of course.... but he a foolish question that I would never ask 1) When inserting resistors/ diodes/ etc, is it ok to cut the remaining wire? That's my *cough* I mean my friends only question. Thanks!
Chankgeez wrote:True, but you can also use the Klon as a tremolo. Just stomp on the switch as fast or slow as you'd like.
Good dealings with: benjuro, hatshirt(2), Eric!, insubordination, theavondon, skullservant, Ilikewater, GardenoftheDead, AndyTran, behndy, JerryTRCD, StopReferencing, philibis, jfrey, bob the robot, Noise..., space60y(x2), jskadiang, Ryan(2), Helter, mordecainyc, many more
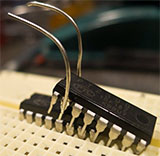
Here's a good method for populating a simple perf/vero/pcb - a) once you're ready to start soldering components, look over the layout diagram to identify the LOWEST PROFILE components, that is to say the parts that will lie flattest to the board: This is usually, in order - Jumper wires, diodes, resistors (lying flat), tiny ceramic disc caps, IC sockets, standing resistors, box caps, transistors/FETS/etc, and large electro caps last of all - You should probably mark the layout to indicate the order. b) Insert the first component (e.g. first jumper), flip the board over and apply slight pressure to hold the component in place. c) snip off the legs of the component WHILST STILL APPLYING PRESSURE; This will leave a millimetre or so of component leg just protruding from the copper side d) Touch the iron and solder to the protruding stumps and track/pad to solder the component in place e) Move on to the next jumper and repeat method, working through the components in height order
This ensures the components are as flush as they can be to the board, uses far less solder and means that you get a lovely smooth solder patch with no sharp ends poking through.
Nocentelli wrote:c) snip off the legs of the component WHILST STILL APPLYING PRESSURE; This will leave a millimetre or so of component leg just protruding from the copper side d) Touch the iron and solder to the protruding stumps and track/pad to solder the component in place
This ensures the components are as flush as they can be to the board, uses far less solder and means that you get a lovely smooth solder patch with no sharp ends poking through.
yes I prefer the snip-then-solder method, too. it's cleaner and you don't risk breaking the solder connection
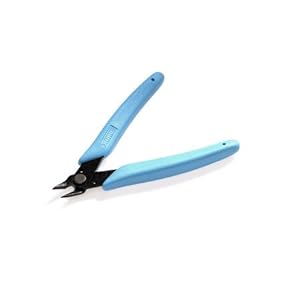
It can definitely be done just as nicely without clipping them first. Just takes practice (and a good pair of wire trimmers!)
I used to scoff at the thought of paying $20 for one wire clipper. Then I actually got one, and feel like an idiot. These will cut blobs of solder, with leads through it.
Jero wrote:It can definitely be done just as nicely without clipping them first. Just takes practice (and a good pair of wire trimmers!)
I used to scoff at the thought of paying $20 for one wire clipper. Then I actually got one, and feel like an idiot. These will cut blobs of solder, with leads through it.
What kind of snips did you get? I need something new in that department...
much better than the nail clippers I was using. use the flush cutters for component leads and wire only! get something else to do all your heavy cutting.